
Today, we'll look at an open-source library maintained by Airbnb called Enzyme that makes testing fun and easy.
Yesterday we used the react-dom/test-utils library to write our first test against the Timeline component. However, this library is fairly low-level and can be a bit cumbersome to use. Enzyme is a testing utility library released and maintained by the AirBnb team and it offers a nicer, higher-level API for dealing with React components under test.
We're testing against our <Timeline /> component:
Using Enzyme
We'll use Enzyme to make these tests easier to write and more readable.
Yesterday, we wrote our first test as the following:
import React from "react";
import TestUtils from "react-dom/test-utils";

import Timeline from "../Timeline";

describe("Timeline", () => {
  it("wraps content in a div with .notificationsFrame class", () => {
    const wrapper = TestUtils.renderIntoDocument(<Timeline />);
    TestUtils.findRenderedDOMComponentWithClass(wrapper, "notificationsFrame");
  });
});
Although this works, it's not quite the easiest test in the world to read. Let's see what this test looks like when we rewrite it with Enzyme.
Rather than testing the complete component tree with Enzyme, we can test just the output of the component. Any of the component's children will not be rendered. This is called shallow rendering.
Enzyme makes shallow rendering super easy. We'll use the shallow function exported by Enzyme to mount our component.
Let's first configure enzyme use the adapter that makes it compatible with React version 16. Create src/setupTests.js and add the following:
import { configure } from "enzyme";
import Adapter from "enzyme-adapter-react-16";

configure({ adapter: new Adapter() });
Let's update the src/components/Timeline/__tests__/Timeline-test.js file to include the shallow function from enzyme:
import React from "react";
import { shallow } from "enzyme";

describe("Timeline", () => {
  it("wraps content in a div with .notificationsFrame class", () => {
    // our tests
  });
});
Shallow rendering is supported by
react-dom/test-utilsas well. In fact, Enzyme just wraps this functionality. While we didn't use shallow rendering yesterday, if we were to use it would look like this:const renderer = ReactTestUtils.createRenderer(); renderer.render(<Timeline />); const result = renderer.getRenderOutput();
Now to render our component, we can use the shallow method and store the result in a variable. Then, we'll query the rendered component for different React elements (HTML or child components) that are rendered inside its virtual dom.
The entire assertion comprises two lines:
import React from "react";
import { shallow, mount } from "enzyme";

import Timeline from "../Timeline";

describe("Timeline", () => {
  let wrapper;

  it("wraps content in a div with .notificationsFrame class", () => {
    wrapper = shallow(<Timeline />);
    expect(wrapper.find(".notificationsFrame").length).toEqual(1);
  });
});
We can run our tests in the same manner as we did before using the yarn test command (or the npm test command):
yarn test
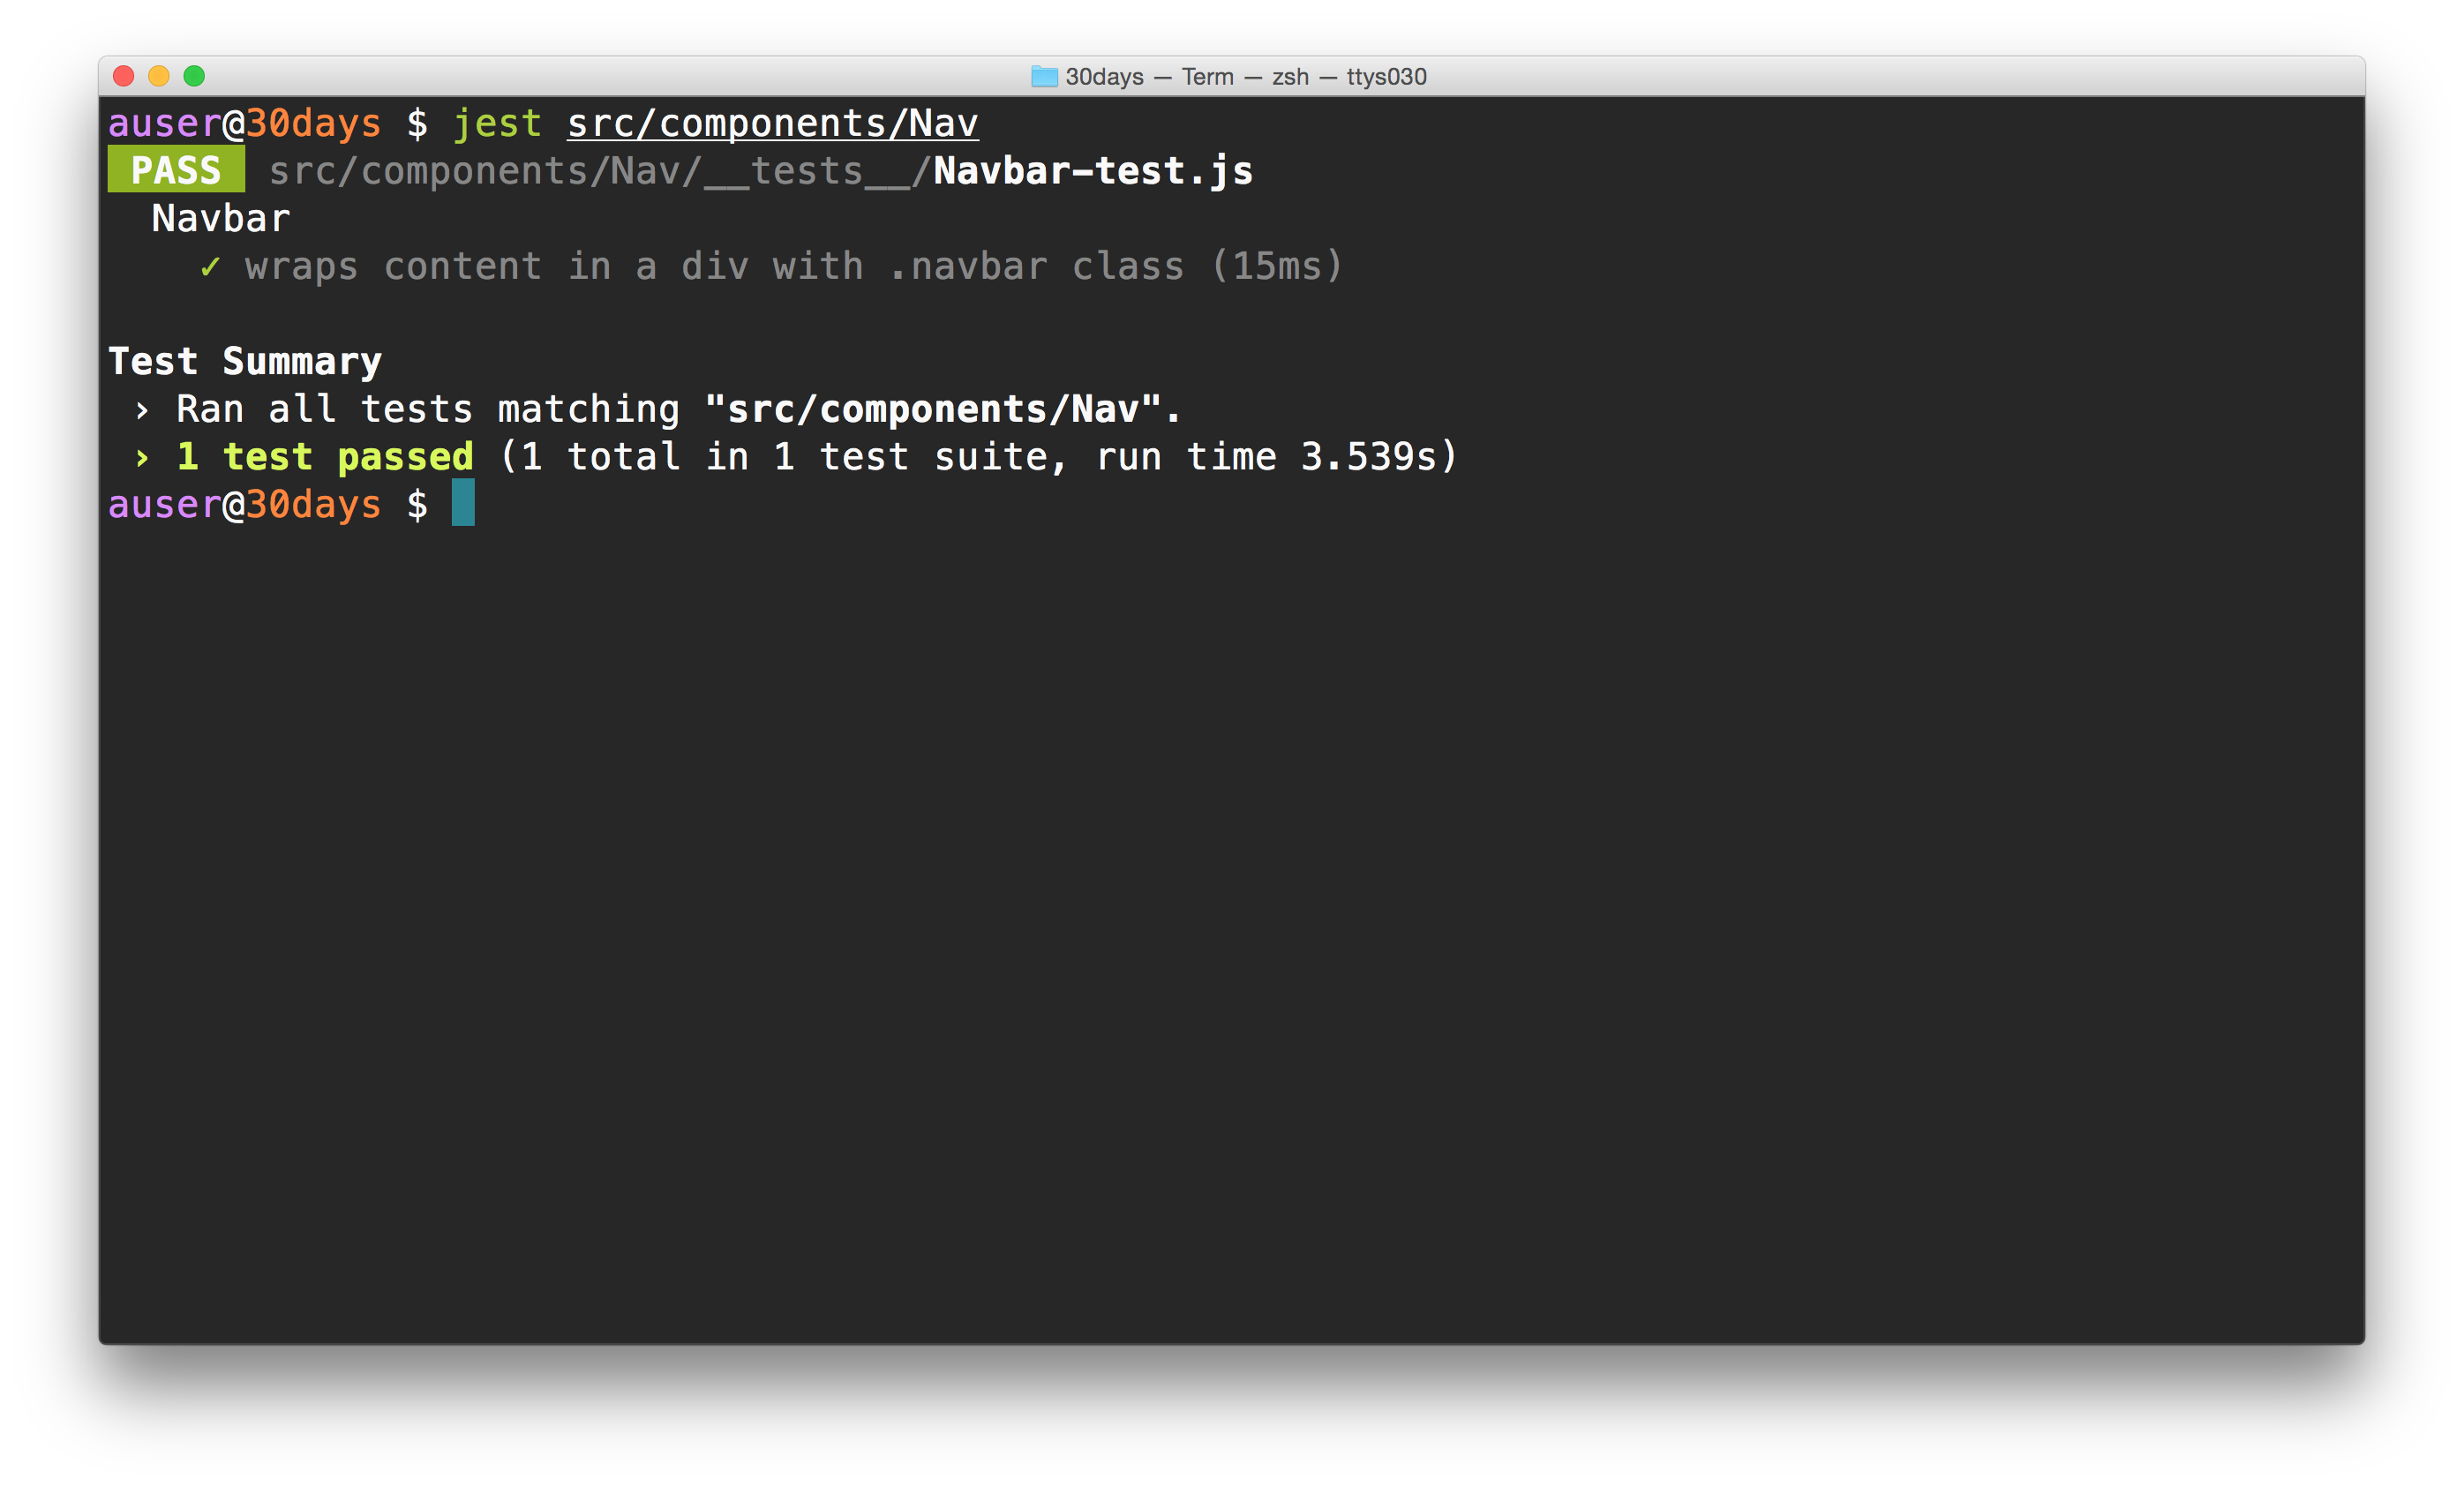
Our test passes and is more readable and maintainable.
Let's continue writing assertions, pulling from the list of assumptions that we made at the beginning of yesterday. We'll structure the rest of our test suite first by writing out our describe and it blocks. We'll fill out the specs with assertions after:
import React from "react";
import { shallow } from "enzyme";

import Timeline from "../Timeline";

describe("Timeline", () => {
  let wrapper;

  it("wraps content in a div with .notificationsFrame class", () => {
    wrapper = shallow(<Timeline />);
    expect(wrapper.find(".notificationsFrame").length).toEqual(1);
  });

  it("has a title of Timeline");

  describe("search button", () => {
    it("starts out hidden");
    it("becomes visible after being clicked on");
  });

  describe("status updates", () => {
    it("has 4 status updates at minimum");
  });
});
If we were following Test Driven Development (or TDD for short), we would write these assumptions first and then build the component to pass these tests.
Let's fill in these tests so that they pass against our existing Timeline component.
Our title test is relatively simple. We'll look for the title element and confirm the title is Timeline.
We expect the title to be available under a class of .title. So, to use the .title class in a spec, we can just grab the component using the find function exposed by Enzyme.
Since our Header component is a child component of our Timeline component, we can't use the shallow() method. Instead we have to use the mount() method provided by Enzyme.
Shallow? Mount?
The
shallow()rendering function only renders the component we're testing specifically and it won't render child elements. Instead we'll have tomount()the component as the childHeaderwon't be available in the jsdom otherwise.We'll look at more Enzyme functions at the end of this article.
Let's fill out the title spec now:
import React from "react";
import { shallow, mount } from "enzyme";

import Timeline from "../Timeline";

describe("Timeline", () => {
  let wrapper;

  it("wraps content in a div with .notificationsFrame class", () => {
    wrapper = shallow(<Timeline />);
    expect(wrapper.find(".notificationsFrame").length).toEqual(1);
  });

  it("has a title of Timeline", () => {
    wrapper = mount(<Timeline />); // notice the `mount`
    expect(wrapper.find(".title").text()).toBe("Timeline");
  });
});
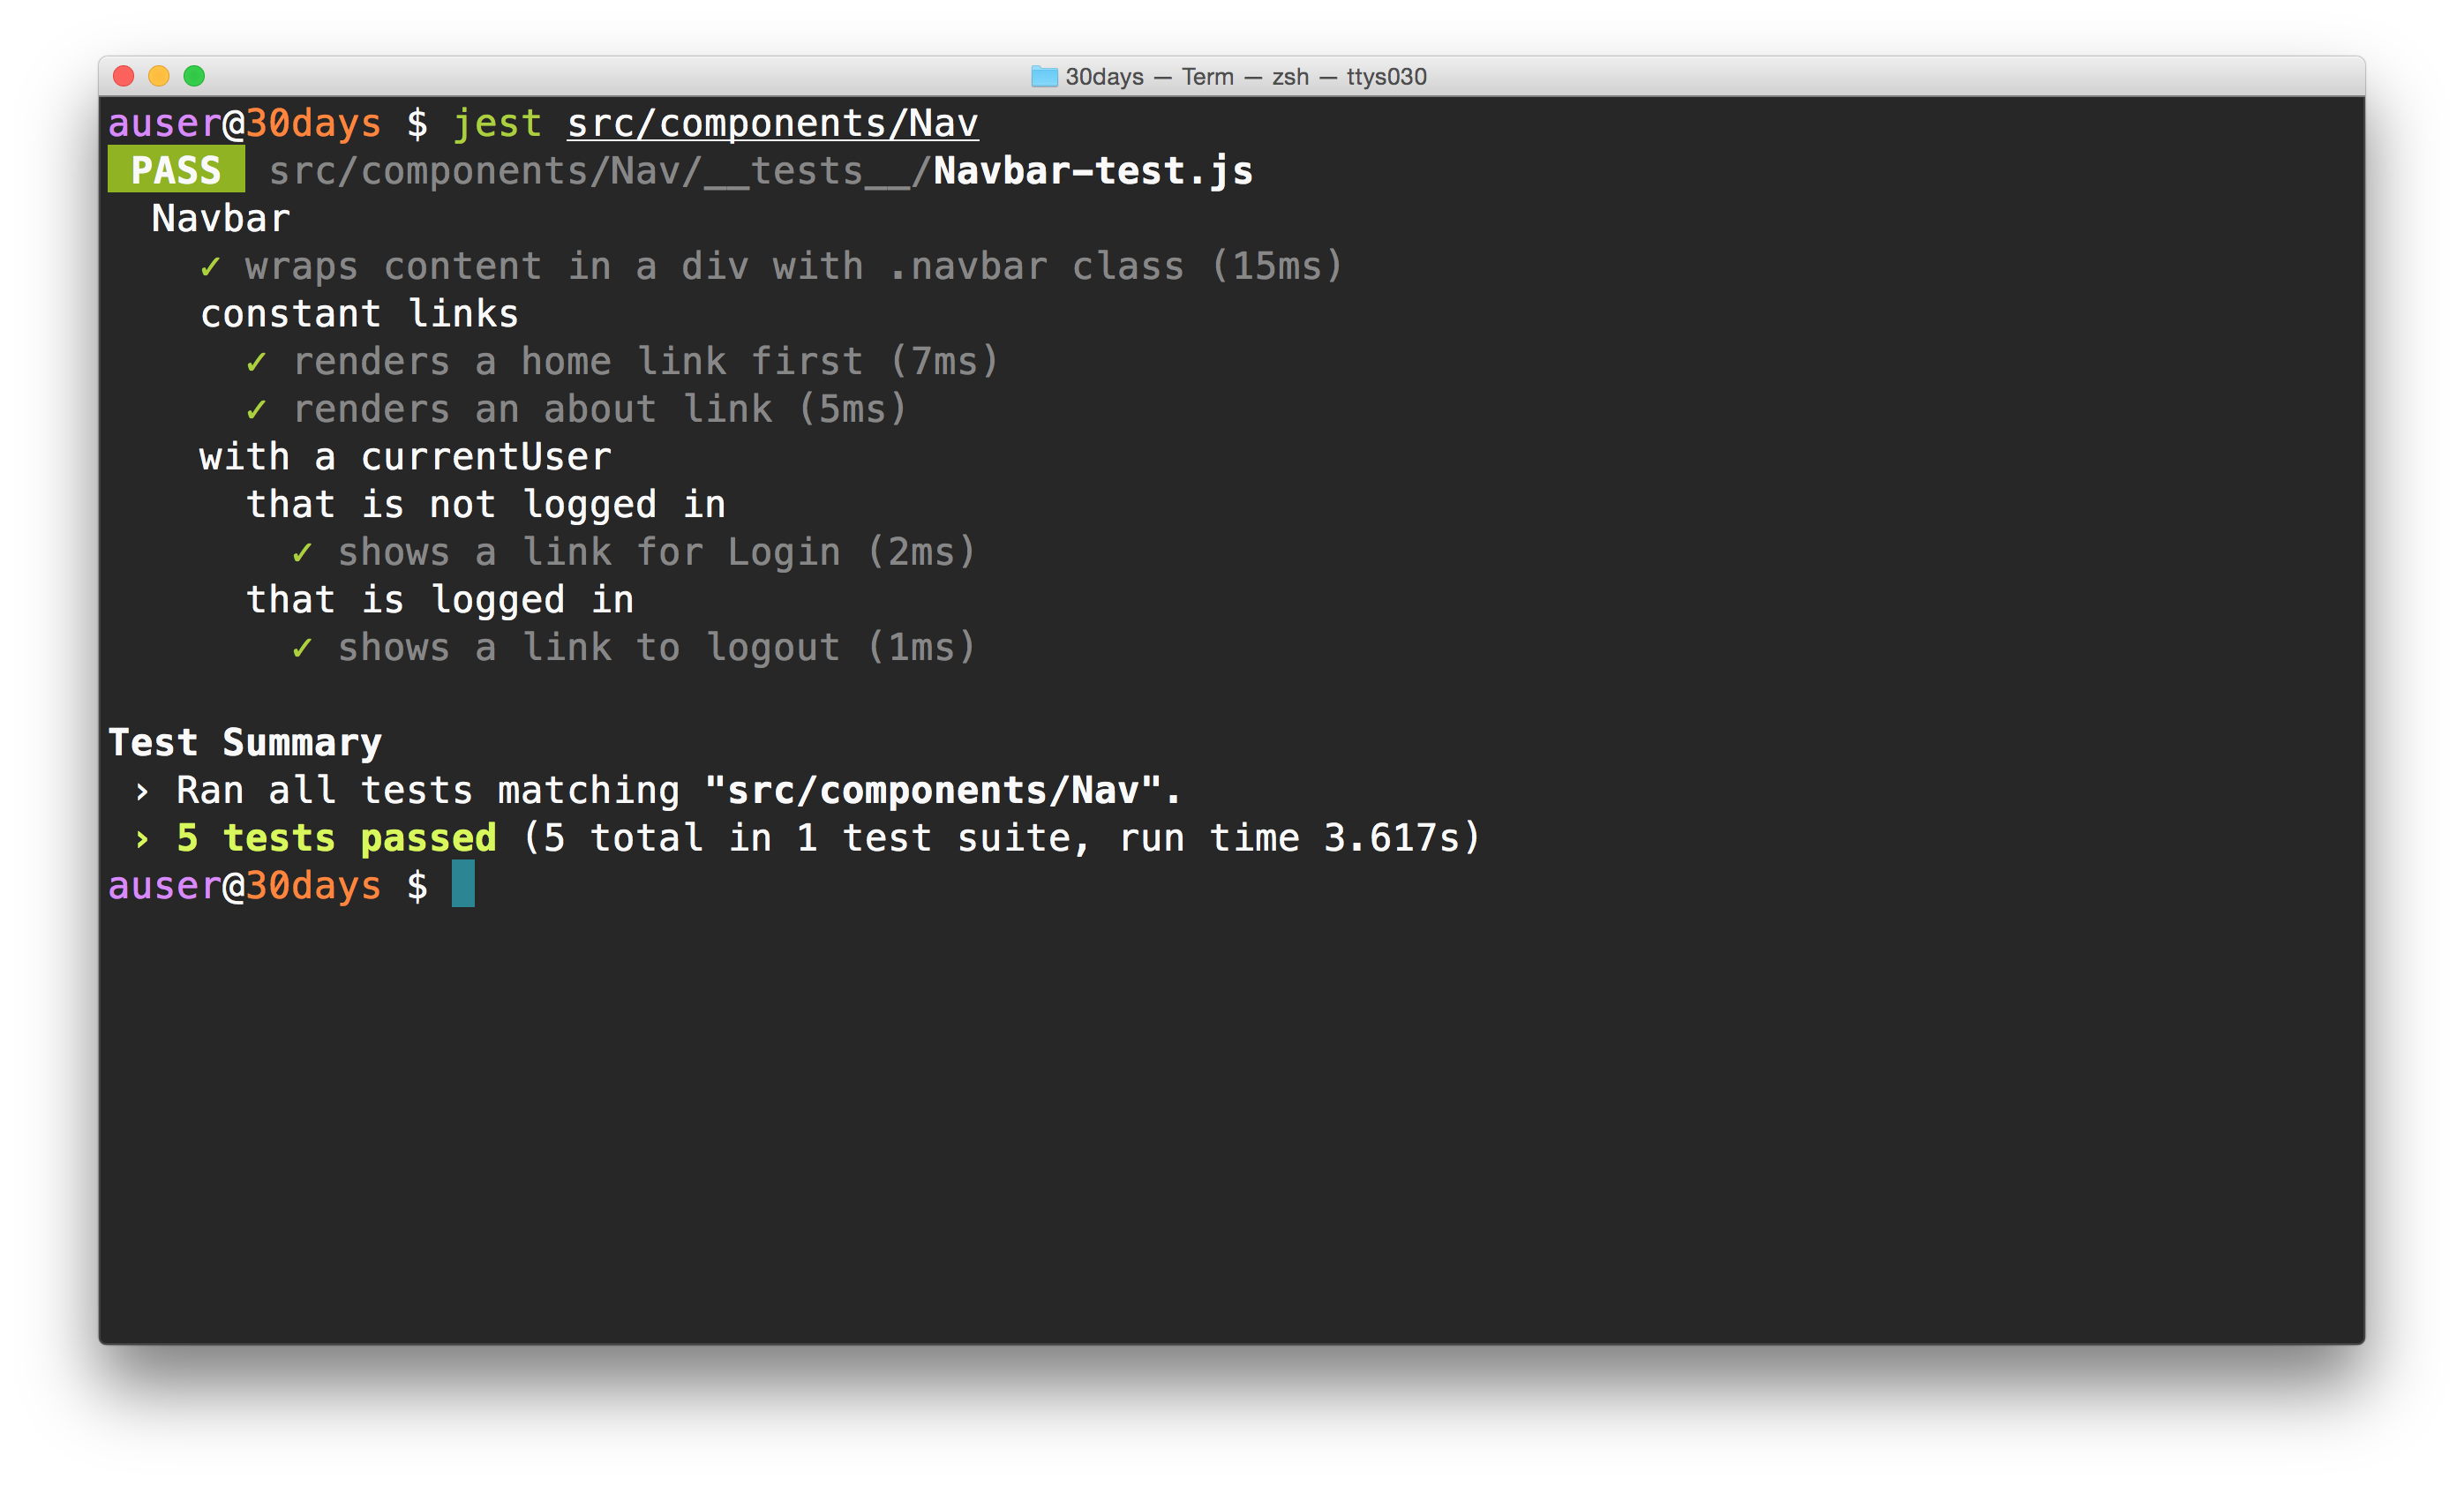
Running our tests, we'll see these two expectations pass:
Next, let's update our search button tests. We have two tests here, where one requires us to test an interaction. Enzyme provides a very clean interface for handling interactions. Let's see how we can write a test against the search icon.
Again, since we're testing against a child element in our Timeline, we'll have to mount() the element. Since we're going to write two tests in a nested describe() block, we can write a before helper to create the mount() anew for each test so they are pure.
In addition, we're going to use the input.searchInput element for both tests, so let's write the .find() for that element in the before helper too.
describe("Timeline", () => {
  let wrapper;
  // ...
  describe("search button", () => {
    beforeEach(() => (wrapper = mount(<Timeline />)));
    // ...
  });
});
To test if the search input is hidden, we'll just have to know if the active class is applied or not. Enzyme provides a way for us to detect if a component has a class or not using the hasClass() method. Let's fill out the first test to expect the search input doens't have the active class:
describe("Timeline", () => {
  let wrapper;
  // ...
  describe("search button", () => {
    beforeEach(() => (wrapper = mount(<Timeline />)));

    it("starts out hidden", () => {
      expect(wrapper.find("input.searchInput").hasClass("active")).toBeFalsy();
    });
    it("becomes visible after being clicked on");
    // ...
  });
});
The tricky part about the second test is that we need to click on the icon element. Before we look at how to do that, let's find it first. We can target it by it's .searchIcon class on the wrapper:
it("becomes visible after being clicked on", () => {
  const icon = wrapper.find(".searchIcon");
});
Now that we have the icon we want to simulate a click on the element. Recall that the onClick() method is really just a facade for browser events. That is, a click on an element is just an event getting bubbled through the component. Rather than controlling a mouse or calling click on the element, we'll simulate an event occurring on it. For us, this will be the click event.
We'll use the simulate() method on the icon to create this event:
it("becomes visible after being clicked on", () => {
  const icon = wrapper.find(".searchIcon");
  icon.simulate("click");
});
Now we can set an expectation that the search component has the active class.
it("becomes visible after being clicked on", () => {
  const icon = wrapper.find(".searchIcon");
  icon.simulate("click");
  expect(wrapper.find("input.searchInput").hasClass("active")).toBeTruthy();
});
Our last expectation for the Timeline component is that we have at least four status updates. As we are laying these elements on the Timeline component, we can shallow render the component. In addition, since each of the elements are of a custom component, we can search for the list of specific components of type 'ActivityItem'.
describe("status updates", () => {
  it("has 4 status updates at minimum", () => {
    wrapper = shallow(<Timeline />);
    // ...
  });
});
Now we can test for the length of a list of ActivityItem components. We'll set our expectation that the list if at least of length 4.
describe("status updates", () => {
  it("has 4 status updates at minimum", () => {
    wrapper = shallow(<Timeline />);
    expect(wrapper.find("ActivityItem").length).toBeGreaterThan(3);
  });
});
The entire test suite that we have now is the following:
import React from "react";
import { shallow, mount } from "enzyme";

import Timeline from "../Timeline";

describe("Timeline", () => {
  let wrapper;

  it("wraps content in a div with .notificationsFrame class", () => {
    wrapper = shallow(<Timeline />);
    expect(wrapper.find(".notificationsFrame").length).toEqual(1);
  });

  it("has a title of Timeline", () => {
    wrapper = mount(<Timeline />);
    expect(wrapper.find(".title").text()).toBe("Timeline");
  });

  describe("search button", () => {
    beforeEach(() => (wrapper = mount(<Timeline />)));

    it("starts out hidden", () => {
      expect(wrapper.find("input.searchInput").hasClass("active")).toBeFalsy();
    });
    it("becomes visible after being clicked on", () => {
      const icon = wrapper.find(".searchIcon");
      icon.simulate("click");
      expect(wrapper.find("input.searchInput").hasClass("active")).toBeTruthy();
    });
  });

  describe("status updates", () => {
    it("has 4 status updates at minimum", () => {
      wrapper = shallow(<Timeline />);
      expect(wrapper.find("ActivityItem").length).toBeGreaterThan(3);
    });
  });
});
What's the deal with find()?
Before we close out for today, we should look at the interface of an Enzyme shallow-rendered component (in our tests, the wrapper object). The Enzyme documentation is fantastic, so we'll keep this short.
Basically, when we use the find() function, we'll pass it a selector and it will return a ShallowWrapper instance that wraps the found nodes. The find() function can take a string, function, or an object.
When we pass strings into the find() function, we can pass CSS selectors or the displayName of a component. For instance:
wrapper.find("div.link");
wrapper.find("Link");
We can also pass it the component constructor, for instance:
import { Link } from "react-router";
// ...
wrapper.find(Link);
Finally, we can also pass it an object property selector object, which selects elements by their key and values. For instance:
wrapper.find({ to: "/login" });
The return value is a ShallowWrapper, which is a type of Wrapper (we can have rendered wrappers and shallow wrappers). These Wrapper instances have a bunch of functions we can use to target different child components, ways to look into the props and the state, as well as other attributes of a rendered component, such as html() and text(). What's more, we can chain these calls together.
Take the case of the <Link /> component. If we wanted to find the HTML of the link class based on all the links available, we can write a test like this:
// ...
it("displays a link tag with the Login text", () => {
  link = wrapper.find("Link").find({ to: "/login" });

  expect(link.html()).toBe('<a class="link">Login</a>');
});
Phew! That's a lot of new information today, but look how quickly we wrote our follow-up tests with Enzyme. It's much quicker to read and makes it easier to discern what's actually happening.
Tomorrow we'll continue with our testing journey and walk through integration testing our application.
Learn React the right way
The up-to-date, in-depth, complete guide to React and friends.
Download the first chapter